Metal Inert Gas or MIG welding is a common process used to join metals together using electricity. This is done by liquifying an electrode and using it to form a bond between the two metals. It can be used for a variety of metals including stainless steel, carbon steel, nickel, copper, and magnesium, etc. In this article, we are discussing the complete MIG Welding Guide Step by Step.
It is not a very complex process and the best welding for beginners as it is quite easy to learn. Some people even claim that it’s as easy as using a glue gun. Even though that Is not entirely true, you can still learn MIG welding with a little practice.
In this article, we will give you the basic guidelines about MIG welding. This is definitely not a definitive guide however we will try our best to go over all the basics. Let’s begin!

Table of Contents
Safety Precautions:
During the process of MIG welding, you will be dealing with large amounts of power and heat. This can prove dangerous if not handled properly. Make sure that you are wearing all safety gear including gloves, helmet, coat, and proper leather shoes, etc. Following are a few important instructions:
- The light that is generated during the MIG welding process can potentially burn your skin and damage your eyes. This is why you should wear a proper welding helmet throughout the process. An auto-darkening one works better but you can use a manual one too. Putting a welding screen around the welding area will help protect others from extreme light and sparks.
- Always wear gloves to protect your hands from any flying splatter or UV burns.
- Try to wear leather clothing while welding because it offers the best protection against heat and UV rays.
- Make sure you are wearing closed leather shoes to protect your feet.
- Make sure that the area is well-ventilated because the MIG welding process produces fumes that are hazardous to your health. Also, if you’re welding for longer durations, wear a mask or a respirator.
- Remove all flammable items from the premises.
Prepare the Metal:
The MIG wire is more prone to oil, rust, dirt, and other contaminants as compared to flux-cored and stick electrodes. Therefore, it is important to properly clean the MIG wire before beginning the welding process. You can use a grinder or metal brush to clean up the solid wire before you strike an arc.
It is also important to ensure that the work clamp is properly connected to the metal because any electrical resistance may affect the wire feeding performance. For stronger welds on thick metals, bevel the joint so that the weld can fully penetrate into the base metal.

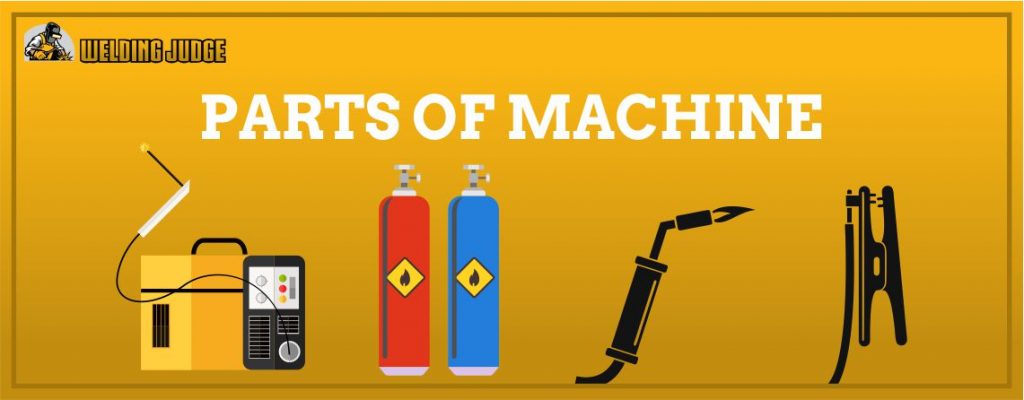
Parts of the Machine:
MIG Welder is made up of many different parts.
1. Welder:
There is a spool of wire inside the welder in addition to a series of rollers that help push out the wire towards the welding gun. The spool of wire is kept in place using a tension nut.
2. Gas Tank:
This carries the shielding gas which is either pure argon or a mixture of carbon dioxide and argon. This gas is used to protect the weld and give it a good finish. You can set the pressure according to your requirement.
3. Welding Gun:
The welding gun has a trigger which controls the flow of electricity and the wire feed. It is covered on the outside by a metal or ceramic cup which helps protect the electrode and also direct the gas out of the gun’s tip.
4. Ground Clamp:
The ground clamp helps complete the circuit by forming a complete connection between the project, welding gun and the welder. It acts as the cathode. It can be clipped onto the metal or to the metal welding table.
Preparing Equipment:
It is important to prepare the equipment before you can start the welding process. Here’s how:
Cables:
Make sure all your cables are tightly fitted in place and not dangling around.
Electrode Polarity:
For MIG welding, the DC electrode has to be positive reverse polarity. These connections are found inside the machine.
Gas Flow:
Turn on shielding gas. Set gas flow rate to about 25 cubic feet per hour. Make sure the gas hose is not leaking.
Adjust Tension:
Ensure the right amount of the tension on the wire spool hub and the drive rolls. Adjust it according to the user’s manual.
Check Consumables:
Replace worn out contact tips, remove any excess spatter from the contact tubes replace wire if it is rusty.
Gas and Wire Selection:
For steel, you can choose from two types of wires. For general welding, choose AWS classification ER70S-3. When you’re welding on rusty steel you will need more deoxidizers so use ER70S-6 wire. Generally, you can use a 0.03-inch diameter wire for a variety of applications.
- For thinners metals, you can use 0.023-inch wire in order to reduce heat input.
- For thicker metals, you can go for 0.035 to 0.045-inch diameter wires for higher heat levels.
For all-purpose welding, the shielding gas usually has a 3:1 ratio of argon and carbon dioxide respectively. This combination helps produce better bead appearance, less splatter, and decreases burn-through on metals that are thinner. If you use pure carbon dioxide, it increases penetration but also increases splatter, and bead appearance becomes rough.
Laying a bead:
If you’re doing MIG welding for the first time then before starting work on a project, you need to first practice laying a bead. For this, take a small piece of metal and try welding a straight line on it. This will help you figure out the power settings and wire-speed you need for the actual welding. All welders are different so the settings vary among them.
Wire Stick-out:
This is the length of the electrode which is sticking out from the contact tube, not including arc length. As a rule of thumb, always maintain a stick out the length of about 3/8 inches. If the arc doesn’t sound right, it is possible that the stick out is too long.
Push/Pull Techniques:
In the push technique, you push the gun ahead of the weld puddle. This leads to lower penetration in addition to flattering, wider bead. This is because you are directing the arc force away from the weld puddle.
In the pull technique, you point the welding gun back towards the weld puddle and drag it away from the deposited metal. This leads to greater penetration and a narrow bead with added buildup.
In our opinion, pushing gives a better view and makes it easier to direct the wire into the joint.
Travel and Work Angle:
In a perpendicular position, the travel angle is the angle that is relative to the gun. Normally it should be around 5 to 15 degrees. Going beyond 25 degrees increases spatter decreases arc stability and leads to less penetration.
The work angle is the position of the gun relative to the welding joint’s angle. It varies according to joint configurations and welding positions.
Positions:
During MIG welding, 4 positions can be used:
i. Flat:
You can do the following welds in this position:
- Buttweld: This a 180-degree joint. Hold the gun perpendicular to the workpiece, directing the filler material into the joint. Include the 5 to 15 degrees of travel angle. A small, back-and-forth motion using the gun can be used for filling a large gap or for making multiple passes. Pausing slightly near the weave bead’s side helps avoid undercut.
- T-joint: Also known as the fillet weld, it is a 90-degree joint. Ensure that the gun is at an equal distance from both pieces.
- Lap joint: Angle is directly proportional to the thickness of the metal. It varies from 60 to 70 degrees.
ii. Horizontal:
In this position you have reduced the gun work angle by around 15 degrees due to the effect of gravity otherwise the filler metal might rollover or sag towards the bottom of the weld joint. The travel angle remains the same as that of a flat position.
When using thick metal for making multi-pass welds or bridging slight gaps where the fit-up is poor, weaving beads can be used for filling a weld joint. Slight hesitation on the weld’s top toe prevents undercut and ensures proper tie-in between weld and base metal. Voltage and amperage settings can be kept similar to those for flat position
iii. Vertical:
Reduce voltage and amperage about 15% from those of flat position. When you’re welding vertical down, start at the top of the joint and then weld down. Vertical down is more useful for thinner metals as arc penetration is lesser.
Vertical up is better for thicker materials because arc penetration is greater. A little weaving motion helps control cooling effects, size, and shape of the weld puddle.
iv. Overhead:
You can use push, drag, or perpendicular technique for this position. Travel speed has to be fast because gravity may cause the weld metal to fall out. Don’t make weave beads too wide. To keep the weld puddle smaller, lower amperage and voltage. Use a wire with a smaller diameter.
Conclusion:
Following the above tips can help you master MIG welding. However, make sure you do your first few projects with an expert and do go through the user manual. Lastly, practice will make you perfect!
Frequently Asked Questions:
1. Is gasless MIG welding strong?
If you’re using a good welder then yes it will be strong.
2. What’s the best gas for MIG welding?
Argon is the best gas for MIG welding.
3. What is the easiest type of welding to learn?
It is easiest to learn MIG welding.
[acf field=”s1″]
Leave a Reply